My first drafting teacher was in his 70’s and had worked for NASA for 40+ years. He was a perfectionist which was annoying at times but I loved his passion for having an accurate and clean look. He required all of us to start on the board with lead holders. Within the first month or so, you started lettering. I personally worked on my ABC’s for a total of two weeks. Yes, that means I wrote my ABC’S for 10 days straight. The lettering could not slant and was always the same size – it did not matter what scale the drawing was.
So why did I bore you with that story?
Find out after the jump.
When we enter the CAD world, it is easy to forget simply drafting guidelines. AutoCAD Civil3D tries to bring this back with the annotation staying the same PRINTOUT size no matter what your scale (VIEWPORT) is.
Sometimes we run into issues though when our drawing is setup in metric and we are printing to an imperial paper type.
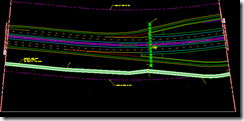
For example, we have a metric drawing setup to plot at 1:1000. However, we are plotting this on 11×17 paper at half-size. In the following drawing the viewport looks correct when our page setup is set to plot an A3 sheet.
 However, when we set our paper size from A3 to 11×17 we change scale units from mm to inches.

 What happens when we save the page setup and we regen the drawing? Look at the following picture.
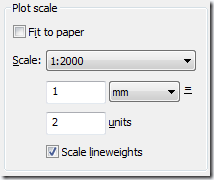
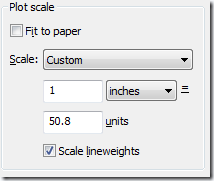
 Our annotation goes from 1.5 (half scale of 3.0 mm full scale plotted height) to 0.0591. Notice your units again in the plot scale printouts. The first plot is set to plot at half scale which 1mm=2 units (3/2=1.5). Whereas the second plot which is the 11×17 the units 1in=50.8 (3/50.8=0.0591). It switches to 50.8 because this is the conversion of mm=inches (2*25.4).
Morale of the Story
The morale of the story is to recognize that AutoCAD Civil3D does not just use your viewport scale but takes your viewport scale BY your plot scale to the annotation’s plot scale height. This creates text that is the same height no matter what scale your drawing plot may be. Ultimately, it is good drafting practice but we can easily see that sometimes workarounds are useful. Two workarounds are available:
Just create a custom metric sheet that mimics the converted size of an 11×17. This keeps your plot scale units where they should be.
Scale up/down your titleblock and viewport and adjust your viewport and plot scales as the need may be.
However, it all comes back to recognizing the height of the annotation in paper space layouts is the PLOTTED height, which is the viewport scale AND the plot scale combined.


One issue that has never been resolved for me is when you have a plan that is rotated in one or more drawings (like matching up plan to profile) and plan readability. In my experience, you can never get the text to sit where you want it and not interfere with other objects from the non-rotated to the rotated plans. This is especially ugly when you add a dragged state to the equation. the leaders go crazy in the rotated plan. I’ve also played with AnnScales and haven’t found any good results yet. Perhaps newer releases with marry the two together.
I think you can also alleviate this problem at plot time by selecting the units in the plot dialog box and setting them to mm. The scale for what was 1:1 (in inches for the 11×17 plot you had set up) will now be 1:0.03937… and the annotative text will plot correctly. Don’t select the scale lineweights checkbox though – which is OK because thay will plot as drawn with no scaling necessary whether you plot at 1:1 or not.